Sunday, November 20, 2016

Stowe Bag Tips and Tricks

I am processing this election as best I can and I'm sure you are too.  One of my favorite coping strategies is to make stuff.  Once I find a pattern that is interesting and challenging (but not too challenging), I tend to make it a few times until I feel that I've mastered it.

This week I worked on the Stowe Bag from Grainline Studios.  This project bag was designed with Fringe Supply Company, an amazing purveyor of knitting accessories and notions.  I've seen the bag on lots of Instagram pages and decided to give it a try.  So far I've completed two small versions of the bag.

My fabric choices are Cotton and Steel linen/cotton blends.   The first is the collection from Rifle Paper Company and the second is a Melody Miller print.  Both are a heavier weight which is good because it gives the bag structure.  The bias tape is made from standard quilting cotton.  The first is again a Rifle Paper print and the second is a Tula Pink Stripe.

The pattern is fairly straight-forward but like making socks, it's better to just do what they tell you to do rather than try to figure out why.  This is particularly important for step 13.  Grainline Studios has a tutorial here if you want more info.

But let's back up.  First, do cut out the pattern for the main bag from the pattern.  For the interior pockets, take measurements and, if you are comfortable with a rotary cutter, cut out the pieces per the dimensions.  Mark all sewing lines with a chalk marker.

I made my own bias tape using a Clover Bias tape maker.  I like my bias a bit wider (it's also easier to work with for a newbie) so I made a finished bias tape with a 1/2" width.  What that means is that I cut bias strips just shy of 2 inches.  I cut mine about 1 7/8th.  I'll explain why in a bit.  You will need about 60 inches of double folded bias tape.

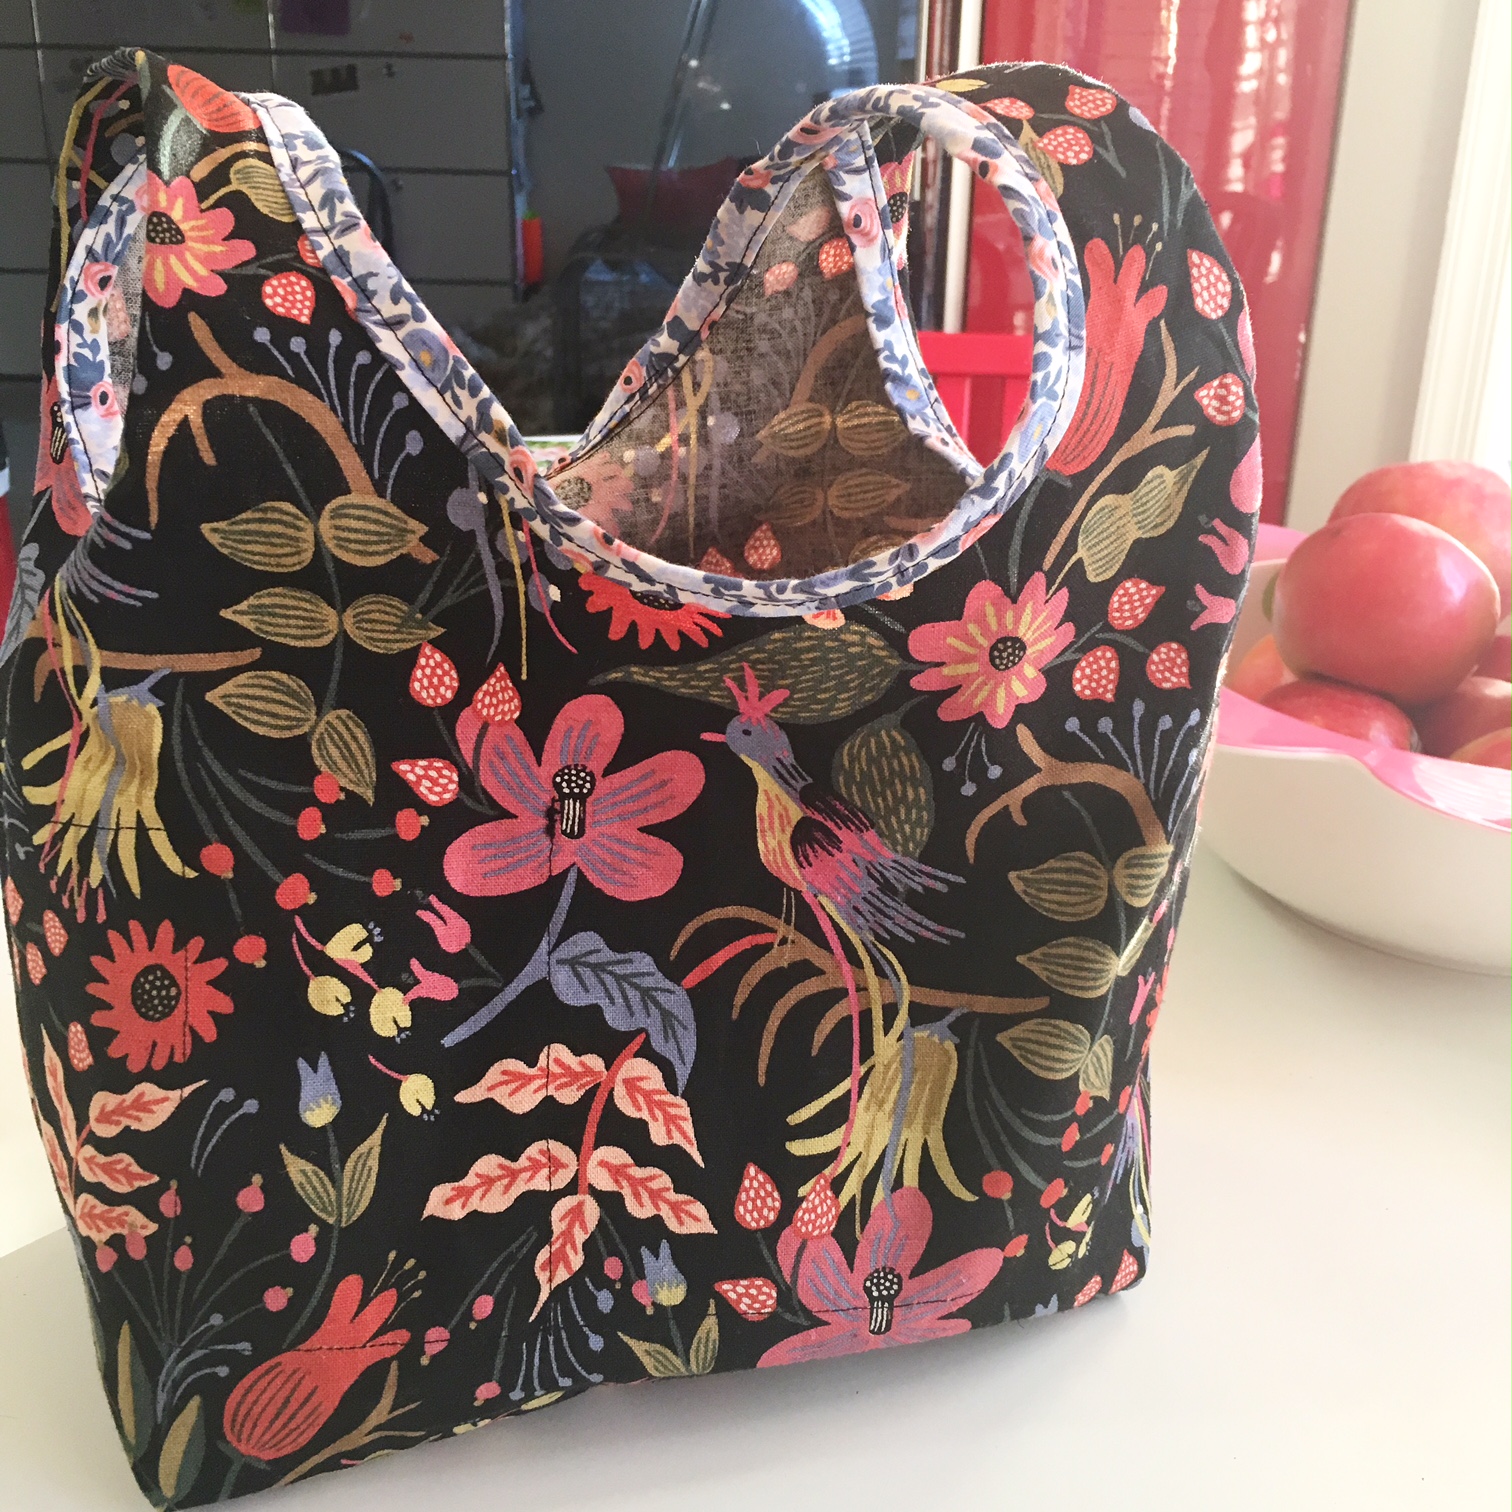
Proceed through the pattern until Step 5.  You may choose to serge the sides and bottom of your bag for a cleaner look.  I did not do that with my first bag seen below which looks fine.  A zigzag will suffice.

To apply the bias tape I have a few suggestions.  In fact this is where I have most of my suggestions.

1. In Step 7, pin bias tape to the wrong side of bag.  Use a lot of pins!!!  Sew.
2. In Step 8, fold bias tape to the front of bag.  PIN.  A lot.  Then if you have a Bernina, put on the #10 foot and place the guide to the left of the bias tape, move needle to the right one or two positions and stitch.  This will look much neater than what they suggested.  I followed their directions for my first bag and my changes for the second bag (bottom of this post).
3. In Step 11, do not sew the bias tape together.  It's easier to apply if it is not in a loop.  Just leave an inch unsewn at the beginning.  When you get to the end, fold the final end over, lap the start of bias tape inside the folded edge, stitch.  Continue to apply bias tape as suggested above.

My second bag looks much better as far as the bias tape.  Again, pinning and reversing the application of the bias tape made a huge difference.

Now to why to cut it 1 7/8" instead of 2".  The main reason is that it is easier to feed it through the bias tape maker!  Try making the bias tape with a strip of each width and let me know what you think. 

The rest of the bag can be finished as instructed. Again, Step 13 will make sense after you do it.  I promise.   I did not do Step 15 because I wanted the bag to fold up when not in use.

I'll probably modify this after I make another one.  As for now, hope my tips help!

And one final thing.  If you would like to purchase this pattern, the store where I work will be happy to order one for you. ;)

Happy Stitching.  

xoxo


Monday, February 15, 2016

"Vintage" Holiday Cookie Recipe

As a child I was fortunate enough to attend a fabulous Montessori preschool.  My memories of this place are warm and fuzzy, colorful and bright, inspiring and fun.  One of the very best parts of the program is that we got to cook.  Often.  And it was real food.  I remember making fried rice, ice cream and cookies.  Lots and lots of cookies.

Fortunately, my mother saved all of the recipes that the school sent home.  Each is illustrated and written out by hand.  I don't have the original copies of the recipes (hint hint Mom) but I did write a few down before I made my way out into the world.  When I was 23 and about to move into my first apartment, my mother and I sat down with her recipe box and copied down some of my favorites.  The Casady School Montessori Cookies made the list of all time best recipes.

Growing up we made these cookies throughout the year.  For Valentine's, Easter, Halloween, Thanksgiving and of course Christmas.  As a teenager, my friends would come over for cookie decorating parties.  It didn't matter how old we got, we still loved baking and decorating cookies with red hots, sugar and sprinkles.

The other thing that made these cookies so special was that my creative mother collected cookie fabulous cutters.  We had them in every shape and size for nearly every occasion.  The best ones were bought from the Hallmark Store.  Even now, almost 40 years later, they have a very distinct 1970's plastic smell.  When my mother moved, my brother and I packed them up and peacefully divided them between our households.


So, by now you are probably wondering what is this amazing recipe.  Of course I'm going to tell you! It's super simple which one would expect since it was made by 4 and 5 year olds.  Generally I do use the almond extract but if you have concerns about allergies, it may be omitted.  Enjoy and happy baking!


Ingredients:

1 cup unsalted butter, softened
1 1/2 cups sugar
3 eggs
1 tsp vanilla extract
1 tsp almond extract
4 1/2 cups all purpose flour
food coloring - optional

Cream butter for 5 minutes.  Add sugar and cream for another 3-5 minutes until lightened in color.  Add eggs one at a time. Scrape down bowl as needed.  Mix in vanilla and almond extract.  Now is the time to also add food coloring.  Make it fairly dark as the color will lighten with the addition of flour and during the baking process.   Mix flour in 1/2 cup at a time.  Scrape down bowl.  You will have a very thick dough.


Divide dough into half or thirds and wrap in wax paper.  I find it best to shape dough into flat discs - it's easier to roll out after chilling.  Refrigerate for 2 hours or overnight.  On a floured surface roll out to 1/4 inch thick.  Cut and decorate.  Bake at 350 degrees for 8-10 minutes depending on the size of your cookie.  If you are using a convection oven reduce heat to 325 degrees.  Baking time remains the same.  They should be a very light brown in color on bottom.

Save one for me.