I actually don't remember a time when I didn't do some sort of stitching. My grandmother taught me to embroider, crochet and knit. My mother taught me to sew and needlepoint. When I was 12 I cross-stitched gifts for my friends. At 13 I was casting on my first sweater. At 15 I learned to hand appliqué and hand-piece patchwork. At 16 I was sewing pajama pants and Laura Ashely-inspired pinafores.
My sophomore year in college I knit one of those big Lopi sweaters - my gauge was so off that it was HUGE and could easily fit two or three people. My junior year I learned to knit continental and stitched an intarsia sweater from a Rowan magazine. I knit my way through graduate school classes and got my first job at a knitting store, Sophie's Yarns (later Rosie's) just off Rittenhouse Square.
From there I worked at other knitting stores, started teaching classes, learned to quilt when I was pregnant, started teaching sewing classes, sold Bernina sewing machines, returned to needlepoint (not teaching that...yet) and now here I am:
Totally and completely immersed in the world of craft.
Through the years many people have suggested that I open a store but I've worked in enough to see how much work that is. They've suggested that I write patterns or do videos - but that takes a tremendous amount of time and I don't like doing the same thing more than 2 or 3 times.
Craft is a way of life for me. Not just a hobby or a job. Our home is filled with items made by myself, my mother, my grandmothers and now my daughter. The art on our walls was painted by aunts on all sides of the family. Everywhere I look there is color and memories. Lots and lots of memories. And joy. So much joy.
My life is craft.
Happy Stitching.
Friday, January 11, 2019
Wednesday, October 17, 2018
Time to knit
When the air turn a bit colder and the leaves start to change color, my hands want to knit.
Either I pull out a project that has been in hibernation over the warm summer months or I contemplate casting on something new. My yarn stash comes down from the shelf, a book or two comes out of the cabinet and needles are pulled from storage.
My mind fills with wonderful knitting possibilities. A fresh tote is pulled from my overflowing collection, perfect for the start of fall and winter knitting. This year it is a canvas book bag from my daughter's Bat Mitzvah. Printed on it's front, in purple, is a retro bowling girl.
Sometimes skeins need to be wound. Though I own a winder and swift, I often choose to sit on the couch and slowly wind the yarn into a tight round ball. One that will torment me for the entire project as it rolls across the floor and under the couch, unfurling along the way. Frustrated, I'll chase it down, wind again and keep knitting.
When the weather turns very cold, I'll knit every night. My fingers staying warm with the completion of each stitch. The click, click of my needles will be the ambient playlist of winter.
I may or may not finish this project by April, when the air turns warmer and the sun shines bright. The project will be then be packed up, hopefully with notes, to be continued later that year.
And so, the cycle continues with thread that runs from one season to the next.
xoxo. happy stitching.
Monday, July 23, 2018
Promise Me One Thing
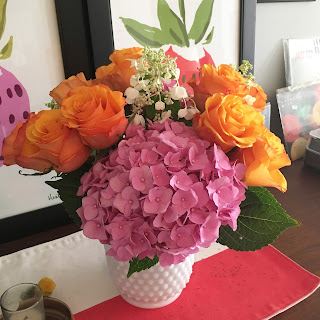 |
| Pink, Orange, Hobnail. Perfect. |
Recently Mitch and I spent a day in NYC. We walked the streets and took in the sights and sounds of one of my favorite places on Earth. Seriously. I'm not exaggerating. I absolutely love NYC.
After an amazing meal at a little restaurant on the Lower East Side, we realized we needed chocolate. So we hopped out of the Lyft and made our way to a convenience store across the street from our hotel.
The options were amazing. Far more than you would ever find in a Wawa or CVS. Again, this is why I love NYC.
Anyway, I made my choice based on the color of the wrapping. It was Pink. I couldn't resist.
 |
| Ritter Sport. Quite Tasty. |
We went back out into the city heat and waited to cross the street. As we were crossing, Mitch turned to me and said,
"Promise me one thing. Always be yourself."
"What?" I asked, a bit surprised.
"Always be you. Don't try to be someone else. Just be Marisa."
 |
| All the LOVE for Heather Ross. |
"Ok."
Monday, July 02, 2018
EPP Community Love

One of the great joys of my life has been the discovery of the English Paper Piecing community. Many many years ago I decided to teach myself the technique but without a group of like-minded stitchers, my interest quickly faded.
It wasn't until I spotted Willyne Hamerstein's book Millefiori at Alewives in Damariscotta, ME that I again decided to give EPP a try. With a bit of investigation I found blog posts, youtube videos and lots and lots of Instagram photos to get me started.
Over 2 years ago the EPP Club at Pennington Quilt Works was born. Many of the original members still join me each month to share their progress, offer support to other stitchers and enjoy the company of other creative women (so far we have no men).
The block above is the Brimfield Block, a quilt pattern designed by the talented duo of Brimfield Awakening. It was a treat to sew with my Liberty fabric stash - many more projects are on the horizon.
Happy Stitching!
Friday, June 01, 2018
Stitching Pink
A long long time ago I started this blog and an even longer time ago I registered the website www. stitchingpink.com. A lot has happened over the years including work as a nurse-midwife, the birth of my daughter Lucy, a stint as a personal trainer and most recently the privilege of selling Bernina sewing machines to customers at Pennington Quilt Works.
So here I am, again, at another crossroads in my life. My job as a Bernina salesperson is coming to a close though I will continue to teach English Paper Piecing and coordinate community events. For the first time in my life I honestly have no plan.
Well, that's not entirely true.
I'm going to rest. And read. And write.
My plan has always been to blog more and make this an active space for my creative pursuits and occasional deep thoughts. But there have been so many roadblocks, most of my own making but many out of my control.
I can't promise that this page will become super-active though I hope that it will become a space where I can explore, with a bit more depth than Instagram, my life. Not all of it of course because I'm sure you don't want to hear about my true hatred of laundry. I mean like I really hate laundry. But the other stuff. My exercise goals. My sewing projects. My cooking adventures.
Also, my plan is to migrate this site to another platform. You will know when that happens which won't be anytime soon. I'm mostly putting this plan out there so that I follow through with it....
Until next time.
Happy Stitching.
Sunday, October 01, 2017
Rugelove

Yesterday I made a batch of raspberry chocolate rugelach. My recipe is a combination of a few recipes plus my own modifications/additions over the years.

I love making this cookie. It's super easy and always a delicious crowd pleaser. You can modify the filling based on your own preferences. My preference is on the sweeter side with raspberry jam and chocolate chips.
Here it is with one caveat: I am not a professional baker so I can't guarantee that these directions are perfect. Also, you may brush tops with butter before sprinkling with sugar but I have found that they are pretty tasty with out the additional butter!
Dough:
8 ounces cottage cheese
1 cup butter - 2 sticks
2 cups all purpose flour
1/4 tsp kosher salt
1 tsp sugar
Filling
1 cup Bonne Maman rasberry jam
1 cup Ghiradelli mini chocolate chips
In an electric mixer mix cottage cheese and butter until well blended. In a separate bowl combine flour, salt and sugar. Add flour mixture to mixer and combine. Do not over mix.
Place dough onto a work surface and knead into a ball. Divide into two. Shape into disks. Wrap in wax paper and chill in fridge for 1-2 hours.
Preheat oven to 350. Use convection if you have it.
Place disks on lightly floured work surface. Roll out to 1/8" thickness and about 8x12" rectangle. Cut into roughly 1 x 4" strips.
Warm jam in microwave for 15 seconds. Spoon thin layer of warmed jam onto strips of dough. Sprinkle chocolate chips on top. Roll each strip and place seam side down on baking sheet lined with parchment paper.
Sprinkle sugar over prepared cookies
Place baking sheet in oven for 17-20 minutes until tops are lightly browned.
Remove from oven and allow to cool for 10 minutes on baking sheet.
Enjoy.
Sunday, November 20, 2016
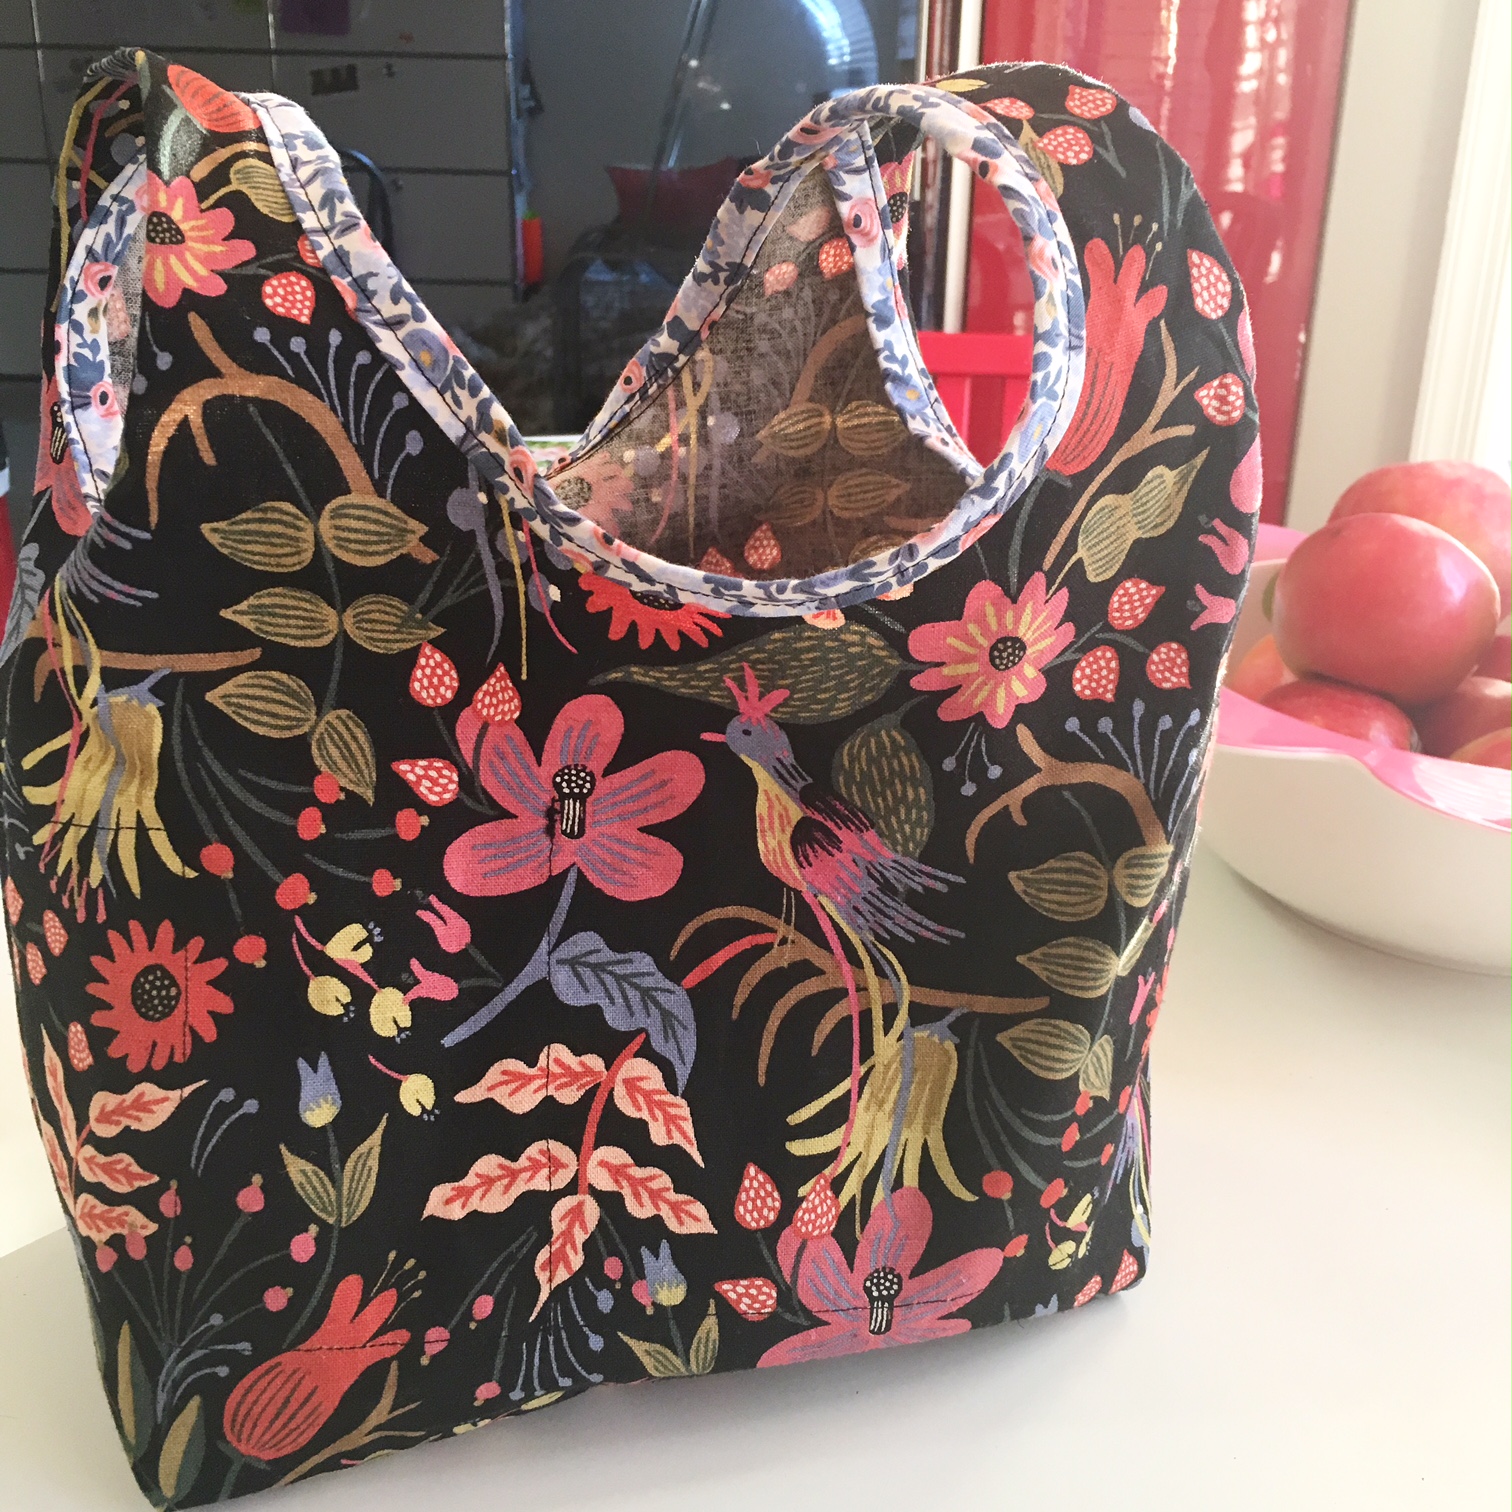
Stowe Bag Tips and Tricks
I am processing this election as best I can and I'm sure you are too. One of my favorite coping strategies is to make stuff. Once I find a pattern that is interesting and challenging (but not too challenging), I tend to make it a few times until I feel that I've mastered it.
This week I worked on the Stowe Bag from Grainline Studios. This project bag was designed with Fringe Supply Company, an amazing purveyor of knitting accessories and notions. I've seen the bag on lots of Instagram pages and decided to give it a try. So far I've completed two small versions of the bag.
My fabric choices are Cotton and Steel linen/cotton blends. The first is the collection from Rifle Paper Company and the second is a Melody Miller print. Both are a heavier weight which is good because it gives the bag structure. The bias tape is made from standard quilting cotton. The first is again a Rifle Paper print and the second is a Tula Pink Stripe.
The pattern is fairly straight-forward but like making socks, it's better to just do what they tell you to do rather than try to figure out why. This is particularly important for step 13. Grainline Studios has a tutorial here if you want more info.
But let's back up. First, do cut out the pattern for the main bag from the pattern. For the interior pockets, take measurements and, if you are comfortable with a rotary cutter, cut out the pieces per the dimensions. Mark all sewing lines with a chalk marker.
I made my own bias tape using a Clover Bias tape maker. I like my bias a bit wider (it's also easier to work with for a newbie) so I made a finished bias tape with a 1/2" width. What that means is that I cut bias strips just shy of 2 inches. I cut mine about 1 7/8th. I'll explain why in a bit. You will need about 60 inches of double folded bias tape.
Proceed through the pattern until Step 5. You may choose to serge the sides and bottom of your bag for a cleaner look. I did not do that with my first bag seen below which looks fine. A zigzag will suffice.

To apply the bias tape I have a few suggestions. In fact this is where I have most of my suggestions.
1. In Step 7, pin bias tape to the wrong side of bag. Use a lot of pins!!! Sew.
2. In Step 8, fold bias tape to the front of bag. PIN. A lot. Then if you have a Bernina, put on the #10 foot and place the guide to the left of the bias tape, move needle to the right one or two positions and stitch. This will look much neater than what they suggested. I followed their directions for my first bag and my changes for the second bag (bottom of this post).
3. In Step 11, do not sew the bias tape together. It's easier to apply if it is not in a loop. Just leave an inch unsewn at the beginning. When you get to the end, fold the final end over, lap the start of bias tape inside the folded edge, stitch. Continue to apply bias tape as suggested above.

This week I worked on the Stowe Bag from Grainline Studios. This project bag was designed with Fringe Supply Company, an amazing purveyor of knitting accessories and notions. I've seen the bag on lots of Instagram pages and decided to give it a try. So far I've completed two small versions of the bag.
My fabric choices are Cotton and Steel linen/cotton blends. The first is the collection from Rifle Paper Company and the second is a Melody Miller print. Both are a heavier weight which is good because it gives the bag structure. The bias tape is made from standard quilting cotton. The first is again a Rifle Paper print and the second is a Tula Pink Stripe.
The pattern is fairly straight-forward but like making socks, it's better to just do what they tell you to do rather than try to figure out why. This is particularly important for step 13. Grainline Studios has a tutorial here if you want more info.
But let's back up. First, do cut out the pattern for the main bag from the pattern. For the interior pockets, take measurements and, if you are comfortable with a rotary cutter, cut out the pieces per the dimensions. Mark all sewing lines with a chalk marker.
I made my own bias tape using a Clover Bias tape maker. I like my bias a bit wider (it's also easier to work with for a newbie) so I made a finished bias tape with a 1/2" width. What that means is that I cut bias strips just shy of 2 inches. I cut mine about 1 7/8th. I'll explain why in a bit. You will need about 60 inches of double folded bias tape.
Proceed through the pattern until Step 5. You may choose to serge the sides and bottom of your bag for a cleaner look. I did not do that with my first bag seen below which looks fine. A zigzag will suffice.
To apply the bias tape I have a few suggestions. In fact this is where I have most of my suggestions.
1. In Step 7, pin bias tape to the wrong side of bag. Use a lot of pins!!! Sew.
2. In Step 8, fold bias tape to the front of bag. PIN. A lot. Then if you have a Bernina, put on the #10 foot and place the guide to the left of the bias tape, move needle to the right one or two positions and stitch. This will look much neater than what they suggested. I followed their directions for my first bag and my changes for the second bag (bottom of this post).
3. In Step 11, do not sew the bias tape together. It's easier to apply if it is not in a loop. Just leave an inch unsewn at the beginning. When you get to the end, fold the final end over, lap the start of bias tape inside the folded edge, stitch. Continue to apply bias tape as suggested above.
My second bag looks much better as far as the bias tape. Again, pinning and reversing the application of the bias tape made a huge difference.
Now to why to cut it 1 7/8" instead of 2". The main reason is that it is easier to feed it through the bias tape maker! Try making the bias tape with a strip of each width and let me know what you think.

The rest of the bag can be finished as instructed. Again, Step 13 will make sense after you do it. I promise. I did not do Step 15 because I wanted the bag to fold up when not in use.
I'll probably modify this after I make another one. As for now, hope my tips help!
And one final thing. If you would like to purchase this pattern, the store where I work will be happy to order one for you. ;)
Happy Stitching.
xoxo
Monday, February 15, 2016
"Vintage" Holiday Cookie Recipe
As a child I was fortunate enough to attend a fabulous Montessori preschool. My memories of this place are warm and fuzzy, colorful and bright, inspiring and fun. One of the very best parts of the program is that we got to cook. Often. And it was real food. I remember making fried rice, ice cream and cookies. Lots and lots of cookies.
Fortunately, my mother saved all of the recipes that the school sent home. Each is illustrated and written out by hand. I don't have the original copies of the recipes (hint hint Mom) but I did write a few down before I made my way out into the world. When I was 23 and about to move into my first apartment, my mother and I sat down with her recipe box and copied down some of my favorites. The Casady School Montessori Cookies made the list of all time best recipes.
Growing up we made these cookies throughout the year. For Valentine's, Easter, Halloween, Thanksgiving and of course Christmas. As a teenager, my friends would come over for cookie decorating parties. It didn't matter how old we got, we still loved baking and decorating cookies with red hots, sugar and sprinkles.


So, by now you are probably wondering what is this amazing recipe. Of course I'm going to tell you! It's super simple which one would expect since it was made by 4 and 5 year olds. Generally I do use the almond extract but if you have concerns about allergies, it may be omitted. Enjoy and happy baking!

Ingredients:
1 cup unsalted butter, softened
1 1/2 cups sugar
3 eggs
1 tsp vanilla extract
1 tsp almond extract
4 1/2 cups all purpose flour
food coloring - optional
Cream butter for 5 minutes. Add sugar and cream for another 3-5 minutes until lightened in color. Add eggs one at a time. Scrape down bowl as needed. Mix in vanilla and almond extract. Now is the time to also add food coloring. Make it fairly dark as the color will lighten with the addition of flour and during the baking process. Mix flour in 1/2 cup at a time. Scrape down bowl. You will have a very thick dough.

Save one for me.
Tuesday, October 27, 2015
A walk down (blog) memory lane
I haven't visited my blog in months. Not sure why I felt the urge to do it today but I did and now I'm here and feel like I need to write something.
During the last hour, I've clicked on links, visiting blogs that I used to read on a daily basis. Some still update regularly, a few shuttered just this year and even more just stopped posting 3 or 4 years ago. Our web life has increasingly become focused on images rather than the written word. I do love instagram but I miss the intimacy of the blog post. I miss the tutorials. I miss the personal journey.
Blogs are still out there and many are quite good. Perhaps it's time to explore some new ones and update my favorites.
As for me, I've been busy working at Pennington Quilt Works and became the Bernina specialist, a job that is fascinating though a bit overwhelming. It's great to be in a creative atmosphere surrounded by so many talented women (and a few men). And I've started sewing again, making lots of mini-projects.
I can't promise many blog posts from me. At the beginning of the year I had this fantasy of writing every day or a few times a week but that hasn't worked out so well. I always felt like I needed a picture to go along. But now, I think writing will do. If you want to see what I'm doing, pop on over to instagram and search for stitchingpink.
Good night and happy stitiching!
Saturday, April 18, 2015
Spools of fresh fabric
The quilt store is filled with gorgeous fabric - I've done my best not to be tempted but yesterday I finally gave in. This is a Moda collection by Basicgrey aptly named "Fresh Cut." I couldn't decide which fabrics to bring home so I purchased a layer cake of 45 fabrics. I knew instantly what I would make with these beauties - Spools by Thimble Blossoms.

The last few weeks have been consumed with cleaning out my fabric stash. I've passed along quite a bit because either. My tastes have changed or I've realized that I'm never, ever going to complete the project for which the fabric was intended. Then there are fabrics that I know should be tossed or donated or sold, but I just can't stand the thought of parting with it. It's either too lovely or I'm sentimentally attached to it.
The thing is, if I'm going to take the time to sew, then I have to love the project. Because my time is limited and precious. And what I make should inspire me rather than make me feel blah.
Happy stitching.
Tuesday, April 14, 2015
Jars and Coffee
These days it's all about Ball glass jars, chalkboards, vintage fonts and rustic interiors. And artisanal coffee.
I've been using Ball jars for years for jam and refrigerator pickles. They are inexpensive and indestructable. Who cares if they are trendy! The new selections and accessories like this and this and these are awesome.
Smitten Kitchen is one of my favorite food blogs and recently she reposted an entry about cold-pressed coffee so I decided to give it a go. But what container to use? Of course, one of those wide-mouthed ball jars collecting dust in the garage.
And now I give you a picture of said jar filled to the brim with delicious coffee. 12 hours seems like forever. But as they say, good things come to those who wait.
Thursday, April 09, 2015
Random rambling post about purpose...
Over the last few months my body basically said "enough." I had near debilitating headaches for days and when I didn't, I was exhausted. The whole experience forced me to rethink my approach to life, particularly how I managed stress, what kind of work I should do and how to be the best parent, spouse and friend. I've had lots of time to think. Think. Think.
For a while I felt like a failure. I kept fighting with my head instead of resting and allowing my body to recover. Many days spent feeling sorry for myself and pretty down in the dumps.
But over time I made peace with my physical condition and continue to do so everyday. The silver lining: I have a new appreciation for the suffering experienced by those living with chronic pain as well as the frustrations that come with navigating our complex healthcare system when you are not well.
Plus I've learned about myself. For years I have been trying to make myself into someone else only to discover time and time again that it can't be done.
And if that's true for me, could it be true for others? Can we really become someone other than who we are destined to be?
For example, my child. Isn't she just who she is? If I'm struggling to figure out life isn't she doing the same thing? And she's doing it all for the first time while I've had 43 years to figure it out. Shouldn't I have more patience with her as she finds her way?
Yes.
And if I'm doing the best I can given my own limitations, isn't eveyone else basically doing the best they can do given where they are in life?
Yes.
That's not to say that I should just accept my own shortcomings and not work towards self-fulfillment and being a better human being. It's that maybe I shouldn't be too hard on myself when I stumble. And maybe I shouldn't be so hard on others when they stumble either. Because everyone is basically doing the best they can with what they've got in that moment.
Well, at least this makes me feel a bit better about the world.
And then last night I came across this video presentation by an author who's visiting Lucy's school today and tomorrow. And he said a lot of the things that I've been thinking about. The video is an hour long and at times silly but eventually he gets to the point.
Of course, he's a brilliant writer. And rather eccentric. Regardless, a lot of his talk resonated with me.
Yesterday I had lunch with a dear friend. I expressed that perhaps I was ready to go back to doing personal training. She paused, looked me in the eye and calmly said "Is that what you really want to do? You need to give yourself time to heal. Really heal before you jump back in. Take this time to figure out what interests you."
Years ago I was presented with the opportunity to build a midwifery practice at a local hospital. The thought of it gave me panic because though I felt it was what I SHOULD be doing, it was not what I wanted to do. "What do you want to do here?" They asked. "I want to teach," I eventually responded.
Not high school or middle school or grade school. But adults. And sometimes kids. And not in a traditional classroom setting. I wanted to share the knowledge I had with others. I also wanted to explore new skills and then teach what I learned others.
Teach. And mentor. And guide.
Because when I teach, it is challenging. It is rewarding when it "clicks" for a student. Because I love to write lesson plans and see them in action. Because I love to think and be excited about something and I want others to be excited too.
Which is why I loved nursing. And personal training. And giving sewing classes.
And I enjoy people. Hearing their stories. Learning from them.
So what now.
Teach. Teach. Teach.
Because isn't that what it's all about? Learning and teaching. Sharing our wisdom. Gaining wisdom.
Well, for me that's what it's all about. Because it's what excites me and gives me purpose. It's what gets me up in the morning. And keeps me up late at night.
Thinking about thinking. And learning. And teaching.
It's just my thing. Who I am. And you know what, that's pretty awesome.
Be well.
For a while I felt like a failure. I kept fighting with my head instead of resting and allowing my body to recover. Many days spent feeling sorry for myself and pretty down in the dumps.
But over time I made peace with my physical condition and continue to do so everyday. The silver lining: I have a new appreciation for the suffering experienced by those living with chronic pain as well as the frustrations that come with navigating our complex healthcare system when you are not well.
Plus I've learned about myself. For years I have been trying to make myself into someone else only to discover time and time again that it can't be done.
And if that's true for me, could it be true for others? Can we really become someone other than who we are destined to be?
For example, my child. Isn't she just who she is? If I'm struggling to figure out life isn't she doing the same thing? And she's doing it all for the first time while I've had 43 years to figure it out. Shouldn't I have more patience with her as she finds her way?
Yes.
And if I'm doing the best I can given my own limitations, isn't eveyone else basically doing the best they can do given where they are in life?
Yes.
That's not to say that I should just accept my own shortcomings and not work towards self-fulfillment and being a better human being. It's that maybe I shouldn't be too hard on myself when I stumble. And maybe I shouldn't be so hard on others when they stumble either. Because everyone is basically doing the best they can with what they've got in that moment.
Well, at least this makes me feel a bit better about the world.
And then last night I came across this video presentation by an author who's visiting Lucy's school today and tomorrow. And he said a lot of the things that I've been thinking about. The video is an hour long and at times silly but eventually he gets to the point.
Of course, he's a brilliant writer. And rather eccentric. Regardless, a lot of his talk resonated with me.
Yesterday I had lunch with a dear friend. I expressed that perhaps I was ready to go back to doing personal training. She paused, looked me in the eye and calmly said "Is that what you really want to do? You need to give yourself time to heal. Really heal before you jump back in. Take this time to figure out what interests you."
Years ago I was presented with the opportunity to build a midwifery practice at a local hospital. The thought of it gave me panic because though I felt it was what I SHOULD be doing, it was not what I wanted to do. "What do you want to do here?" They asked. "I want to teach," I eventually responded.
Not high school or middle school or grade school. But adults. And sometimes kids. And not in a traditional classroom setting. I wanted to share the knowledge I had with others. I also wanted to explore new skills and then teach what I learned others.
Teach. And mentor. And guide.
Because when I teach, it is challenging. It is rewarding when it "clicks" for a student. Because I love to write lesson plans and see them in action. Because I love to think and be excited about something and I want others to be excited too.
Which is why I loved nursing. And personal training. And giving sewing classes.
And I enjoy people. Hearing their stories. Learning from them.
So what now.
Rest. Rest. Rest.
And then
Teach. Teach. Teach.
Because isn't that what it's all about? Learning and teaching. Sharing our wisdom. Gaining wisdom.
Well, for me that's what it's all about. Because it's what excites me and gives me purpose. It's what gets me up in the morning. And keeps me up late at night.
Thinking about thinking. And learning. And teaching.
It's just my thing. Who I am. And you know what, that's pretty awesome.
Be well.
Friday, January 30, 2015
Unraveling and stitching together again
When speaking to friends about what led up to my headaches, I've found myself increasingly using the term "unraveling." Back in December I felt more physically broken but now as the pain has receded and I resume normal activities, I've had time to reflect on 2014. It was a slow process of not taking care of myself that led to this unraveling.
There's no reason to detail why or what I did or didn't do but that it happened. And then one day I started getting headaches. And they just didn't stop. My body was saying "enough."
But here's what I have realized. Unraveling isn't such a bad thing. Because when you unravel a sweater, you still have a ball of yarn. And that yarn can become anything. It is full of potential. It could be another sweater, a vest, a hat and mitten set, a pair of socks, part of a warm afghan. It could be knit tightly, loosely or just right. A ball of yarn can be anything.
And so, that's me. An unraveled Marisa. Ready to be stitched back together. I'm doing swatches. Getting my supplies. Exploring my options. Modifying patterns. Writing my own directions. I'm full of potential.
I just have to remind myself, that this is about the process, not the finished product.
And yes, my ball of yarn is pink. Hot pink.
Be well. Happy stitching.
Tuesday, January 20, 2015
Stitching with Lucy
A few days ago I was stitching along when Lucy scooted up next to me and said "teach me." I was doing a fairly complex background stitch but I slowed down to show her how the stitches slanted to the right when working left to right and then to the left when working right to left. The needle skips a couple of "holes" to create longer stitches. "I want to do that. I want to do what you do."
Yesterday we stopped into our local store where they were having a trunk show of some lovely designs. Lucy picked out a Valentine canvas and lots of metallic thread. To my delight it was pink but I knew better than to say anything lest she change all the colors to black!
When returned home, I retrieved a practice canvas for her to review the basics of basket weave and continental stitch. She quickly remembered the stitches. We then settled into the day bed in the sewing room, turned on the Ott Lite, set up a pair of little scissors and a needle threader and got to work. With a needle in my hand, I directed her hands where to go. After a few stitches, she confidently began placing the thread on her own, in her own way. I gently guided her, reminding myself that this wasn't about the finished product, but about the process.
And it's also about continuing the legacy. I come from a long line of stitchers: Quilting, sewing, embroidery, beading, needlepoint. Every stitch I take, connects me with the women who came before me. By teaching Lucy, I am connecting her with them as well, sharing our secret language of stitching. She is communing with her past as well as creating memories for her future.
The stitch you take is in the past, but the product you make lasts into the future. Sharing our knowledge and skills is a gift we give to ourselves and our children.
Stitch on.
Monday, January 05, 2015
Stitch by numbers - aka, Needlepoint
I've tried needlepoint countless times (pun intended.) As a kid, I couldn't seem to keep track of where I stopped my last stitch and ended up with a ridge on the canvas. I tried again after I got married when my mother gave me a canvas complete with needles, yarn and fabric for the back. It was a large pink bow. I worked on it for a bit but got bored. And to be honest, I didn't really like the design, sorry Mom.
I jumped into needlepoint again about 8 years ago during a round of IVF. I'd knit my way through the infertility treatments that resulted in Lucy but I didn't find that knitting was much comfort this time around. Plus, I had Lucy to keep track of, so counting stitches and worrying about dropped stitches was more than I could handle. So I picked out an adorable painted canvas of a little girl's dress. It was part of a larger collection. I envisioned completing all of them, having them framed and hanging in Lucy's room. I pulled out my little cheat sheet from the kit my mom gave me and got to work.
But instead of relaxing, it was frustrating. Needlepoint is worked on a grid. Each "cross" of the warp and weft is painted with a color coordinating to suggested thread color. My dress was full of rounded flowers and ruffled edges. I would sit for what seemed like hours staring at one of these crosses that was half white and half yellow trying to figure out if I should stitch white for a daisy petal or yellow for the daisy's center. Sometimes I would just give up, and go back to stitching the background, where I didn't have to make a judgement call. I longed for the ease of knit one, purl two.
The IVF cycle failed. I rolled the canvas up and stuck it in the back of a cabinet along with other UFOs such as lace baby blankets, crocheted granny squares, felted wee people. Every once in a while I would pull it out and stitch a bit only to lose interest, again rolling it up and placing it back with its other lonely friends.
A couple of years ago, all of that changed. I saw a canvas that I just had to have. A jolly Santa donning a colorful turban. My heart said it was time. Time to needlepoint. So I bought it. When I got home I dug out my Needlepoint book and set to work only to become quickly frustrated by my continue indecisiveness over what color to use when two colors seemed possible.
Then, Eureka! The local needlepoint store had a trunk show of the most adorable Lilly-inspired canvases. I bought one that came with a stitch guide. Obsession set it. It was completed in a matter of weeks. Another one was purchased. Then another. I was on a roll.
I quickly realized that this was an expensive hobby so I ordered every book ever written on the topic of finishing needlepoint and taught myself how to block my canvases, finish them and make my own cording.
That old hesitation of which color to use was gone. The words of a friend came back to me: "Needlepoint is easy. It's like paint by numbers but with thread." And she's right. I love it because I can pick it up and out it down without worrying about losing my place. It can be rolled up and tucked into a purse. It can be pulled out in a carpool line, at a swim meet, on the train, a bus, during Sunday afternoon football-watching.
And now, it's not related to anything sad or bad. It's just fun. And when I'm finished, I have the pleasure of knowing I made something from start to finish all by myself.
It might just be time to pull that little dress out of the cabinet. I'm certain I can figure out when to stitch white and when to stitch yellow. That IVF cycle didn't result in a baby but there's no reason it can't result in an adorable little needlepointed baby dress to hang in my room.
Happy Stitching!
Sunday, January 04, 2015
2015 - the year to write
People don't write anymore. They don't write thank you notes. They don't write emails. They don't write birthday cards.
But what's weird, is that they do write short little comments on twitter. tags on instragram. tons and tons and tons of texts. They write comments on websites. They write comments on friends' facebook pages.
They also don't call. Or return calls. Or leave messages or listen to messages.
Truthfully, in all of this, I'm referring to myself. Though I am working on the thank-you note thing.
In 2013 I took a journaling class and loved it. I journaled daily. I explored all sorts of stuff. But then I felt like I had no time to do it. But I used to. Where had the time gone? I'm not working longer hours. Lucy actually has a longer school day. I hardly cook. My attention to housekeeping is minimal.
So what was I doing that took up all of this time?
I was reading comments on FB. Writing comments on FB. Visiting buzzfeed. taking a quiz or maybe two (three.) Reading the NYTimes, reading the most emailed articles on the NYTimes. Reading the top comments of the most emailed articles on the NYTimes.
Each action was maybe a minute or two. But these minutes added up and probably totalled 30-45 minutes - the amount of time I felt I didn't have to write.
now what?
Do I just unplug, write just for the heck of it? I think maybe yes, at least for a bit.
You see, 2014 was a really crappy year for many reasons. Nothing that I'm going to detail here. For the most part, everything has worked out and is going to be ok but in the midst of it all my body kind of rebelled against me.
My stomach was a mess for a bit.
My knee started hurting.
And then, at the end of October, I had my first visual migraine aura, a few days later, another one followed by another followed by a headache that never went away. And then on my birthday a headache that scared me, my husband and Lucy. Since then, I've seen doctors, massages therapists, an acupuncturist, my pharmacist knows me by my first name and my head has been run through a scanner.
The one thing I kept thinking is, if I could just write, if I could find the time to write, then maybe this would be better. If I could get the stress out of my shoulders, through my arms, my hands, my fingertips and on to a page, then maybe it would be better.
But the headaches changed my sense of time. It made things speed up and go slow. Life was either blurry or ultra-clear. The meds cause me to lose words sometimes or that could be due to being in my 40's. And sometimes I'm tired, which could also be due to the fact that I'm human.
I used to think that exercise was the magic bullet to wellness and I still think it's pretty important and food is too. But now I'm beginning to realize that we need to give ourselves time. Maybe just some extra time and space to be - ok, well that's a post for another day....
Back to this. So, my headaches are getting better. Or rather, my head, neck and shoulders are getting better. I'm starting to think I can be a human most of the time. But I need to take these moments to figure out what it is that I want to do. I can't just sit around and look at Buzzfeed all day. Just not fulfilling, interesting yes, fulfilling, no.
I'm making a plan.
Write. Every day. Here. Could be complete nonsense. Could be about my love of the color pink. Or my hatred of the word "moist." Or perhaps my favorite book ("The Summer Book" by Tova Jansson if you must know.) Or my intense love of all things Portland, OR.
The writing won't be awesome. Not something to publish. No longer do I long for HuffPo to pick up one of my posts for their site. I'm not going to be a famous craft blogger. Or mommy blogger. Probably never going to publish a book. Or get that PhD. I'm just going to do my thing. And focus on healing my head.
That's it for now. I've got some needlepointing to do. Another pink ornament of course. It's less that 12 months to go until Christmas and there's lots of stitching and enjoying to be done.
Sunday, June 22, 2014
What I've been doing instead of writing
I get up in the morning thinking I will write. But first I scan Facebook. When nothing is there, I go through my email. When that’s complete, I head on over to The Weather Channel to see what’s in store for today - should I wear short sleeves or long sleeves? Sandals or sneakers? What’s the weather in Maine? Oklahoma? How much rain have we had this month? Is it going to rain today? Then, once I decide what to wear, I click on the home button and make my way to the NYTimes where I read a few editorials and a bunch of comments on editorials. I consider writing a comment but then decide to instead post something to Facebook about an article I read. Then I scan Facebook again and find some cute pictures of guinea pigs which I email to a friend and my daughter. I hop over to the photographer's website and look at her other pictures of guinea pigs. And some pictures of ladybugs. Very cute. Then I check my email again and delete a bunch of promotional emails except the ones from the Gap and Purl Soho and Bernina. I’ll go back to those at another time. Then I start thinking about what I am going to wear and click over to the Nordstrom's website and check out the designer sale. I put a few things in my cart then google the items to see if there are better prices on another site, which there aren’t. But I'm not sure what size I need so I decide to go back to my cart later. Then I decide to check out Barney’s to see if there are any PRADA shoes on clearance. Nope. Which is ok because I haven't liked the last 3 or 4 seasons of PRADA shoes anyway. What was the weather again?
Friday, January 17, 2014
Core Exercises Part Two
This week for in my Core for Beginners Workshop I focused on exercises using stability balls as well as medicine balls or Bosu Soft Fitness Balls. For beginners I'm also a big fan of the Bosu Ballast Balls as they are a bit more stable due to the weight of the sand. There are lots of sites with great stability ball exercises but I think this one is particularly awesome! You have to register to have access but it is worth it.
These exercises may be mixed with the exercises from last week. I recommend 2 - 3 sets of 10-15 reps for each exercise.
Bridge Press with feet on ball
Bridge Hamstring Curl
Reverse Crunch
Quadruped with abs on ball
Side Plank
Side Leg Lifts on ball
Windshield Wipers with calves on ball
Standing Russian Twist with either medicine ball or stability ball
Standing Side Bends with or without light weights
Also, if you are looking for a good exercise app, try Sworkit. Easy to use and great variety.
Get moving!
Monday, January 06, 2014
What Do We Mean When We Talk about Core?
The gym where I work is offering trainer workshops for the month of January and I was asked to come up with a topic to present. After a few days I settled on "Core for Beginners."
These days fitness people throw around the word "core" the way the fitness people of the past used the word "abs." But what is "The Core" and why is it important?
Core:
A simple way to think about your core is to think of it as your body's center. You can also think of it as your body's base from which your extremities extend. Your head, arms and legs are attached to your core.
In a spiritual sense, you can also think of your core as your heart's center or your "core beliefs."
In fitness, your core is the basic musculature that supports your pelvis and your spine. It's role is to provide stability to you in movement. Essentially your core muscles allow you to move your body in a variety of ways (planes of movement.)
Muscles of the Core
There are four basic muscles groups of the core.
Exercises for the Core
Truthfully, any dynamic movement will involve the core. But if you want to specifically work the core, then there are an infinite number of exercises that will strengthen the muscles that support your body. Below is a listing of mat exercises that can be done at home or in the gym. These are my favorites and all of my clients are quite familiar with them.
And, please, always maintain a neutral spine to protect your back. The easiest way to to that: keep you head on the floor!!!
These days fitness people throw around the word "core" the way the fitness people of the past used the word "abs." But what is "The Core" and why is it important?
Core:
A simple way to think about your core is to think of it as your body's center. You can also think of it as your body's base from which your extremities extend. Your head, arms and legs are attached to your core.
In a spiritual sense, you can also think of your core as your heart's center or your "core beliefs."
In fitness, your core is the basic musculature that supports your pelvis and your spine. It's role is to provide stability to you in movement. Essentially your core muscles allow you to move your body in a variety of ways (planes of movement.)
Muscles of the Core
There are four basic muscles groups of the core.
- Abdominals: rectus abdominus, the tranverse abdominus and the internal and external obliques
- Spine: erector spinae and multifidus
- Pelvic floor
- Hip gluteus maximus and rectus, quadriceps, psoas
This is a pretty basic list. For more detail you can visit an anatomy website.
Exercises for the Core
Truthfully, any dynamic movement will involve the core. But if you want to specifically work the core, then there are an infinite number of exercises that will strengthen the muscles that support your body. Below is a listing of mat exercises that can be done at home or in the gym. These are my favorites and all of my clients are quite familiar with them.
- Bridge
- Dead Bug
- Quadreped - same as dead bug but on hands and knees
- Plank - start on hands, progress to forearms
- Side Plank - start with one knee down
- Toe Taps
- Reverse Crunches
- Segmental Rotation
- Superman
- Thread the Needle
And, please, always maintain a neutral spine to protect your back. The easiest way to to that: keep you head on the floor!!!
Check back next week for a second list of exercises using exercise balls and other equipment.
Be well and get active.
Thursday, October 10, 2013
Changing and Adapting and Enjoying the Process
There is no doubt that the seasons are changing – the leaves are falling, there’s a chill in the air and the skies are grey. It happens every year but it always seems to catch me by surprise. However this predictable change is also quite comforting. I know that cooler weather is coming, what I need to do to adapt to it and approximately how long it will last.
So, what does this have to do with fitness and wellness? In a direct way, these changes bring challenges to our ability to take care of ourselves. Parties, food, and the disruption in our routines all come with the fall and winter holidays. But we know this is going to happen because it happens every year. Therefore we can plan for it, adapt our habits and enjoy the process knowing that these seasonal fitness challenges will end.
However, I want you to consider changing how you view this time of year. Rather than focusing on filling it with food and libations, focus on filling it with laughter and friendship. Rather than rushing from store to store for last minute items, take time for a walk outdoors and enjoy Mother Nature as she goes through her ritual. Rather than feeling constantly overwhelmed, set your intention to enjoy the opportunity to celebrate holidays with your friends and loved ones.
Start planning now for the challenges ahead so that you can enjoy the present moment. Be aware of your triggers. Be kind to yourself.
The point of fitness and wellness is to be able to enjoy your life. Have fun. Celebrate. Jump in a pile of leaves. Throw a football with your kids or grand kids. Meet a good friend for a cup of coffee. Make a healthy vegetable stew to keep you warm on a cool night.
Because this time will pass and the season will change again. Don’t worry, the best part is, you get to do it again next year.
Be well
Subscribe to:
Posts (Atom)
